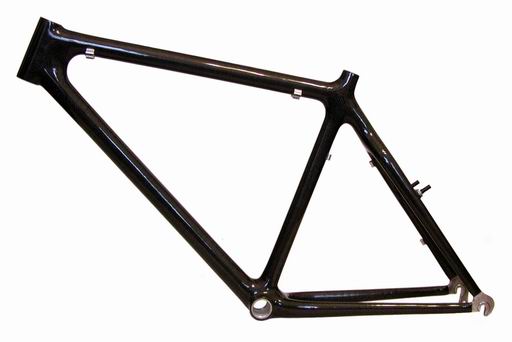
Everything began after I read the article How I Made a Carbon Fiber Bike in My Garage by Damon Rinard. Thanks to this excellent article, I decided to make a MTB frame, even though I've never dealt with carbon composites before (except carbon brakeboosters I made for my bike long ago). I always wanted to own this kind of frame. Frame geometry - I chose a standard triangular geometrical frame because I like this design very much and I think that in terms of stress it is the best possible shape.
Metal parts - This included a bottom bracket shell, head tube, short seat tube, cable stops, rear dropouts and a rear brake bosses. All parts are duralumin. Used thin walled tubes and cable stops were made on a lathe and I purchased rear dropouts and brake bosses from one good bike supplier.
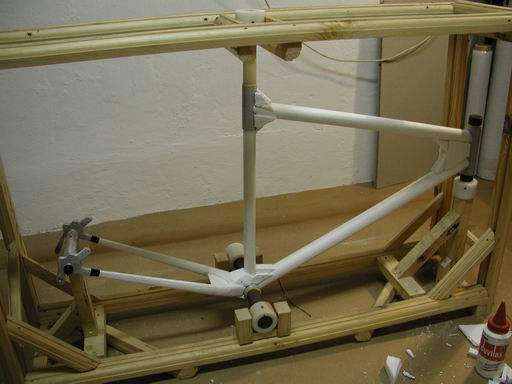
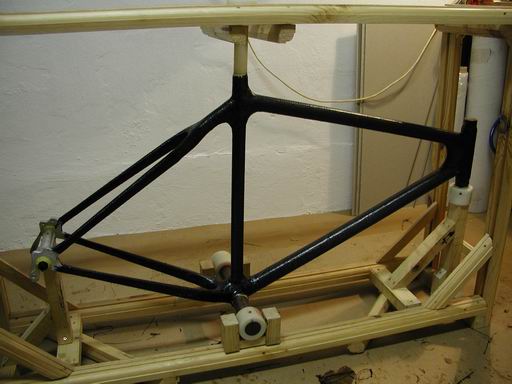
Frame jig - I built a frame jig from wooden rods and some lathed parts from a material similar to Teflon and connected with screws. As a template of frame dimensions for construction of a jig, I used my bike frame that I've ridden before. You can see how this frame jig looks in the picture. The completed jig was stiff enough and guaranteed the position and alignment of metal parts during the construction of the foam core.
Foam core - I used Styrofoam to make the core. I wrapped one light layer of fiberglass around the duralumin tubes and part of the rear dropouts to insulate between the duralumin and the carbon against galvanic corrosion. I had rods made from Styrofoam of the necessary diameters (thanks, Ludo). Also, I wrapped these Styrofoam rods with one light layer of fiberglass to increase their rigidity. The cross sections of the chain stay and the seat stay were elliptical.
In this picture you can see the duralumin parts in their exact position. The top tube and down tube were also bonded with carved small pieces of Styrofoam for the next sanding. In the front of the picture on the ground the chain stay was being prepared for sanding (to achieve proper shape) and bonding.
Here is the aforementioned chain stay bonded.
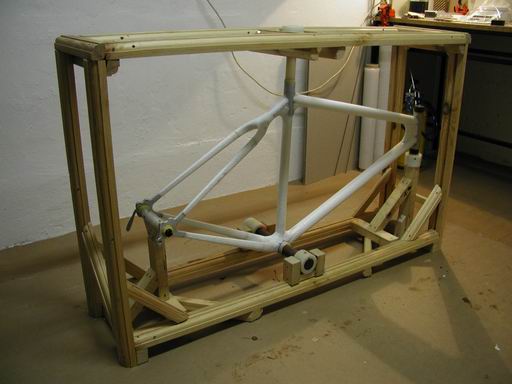
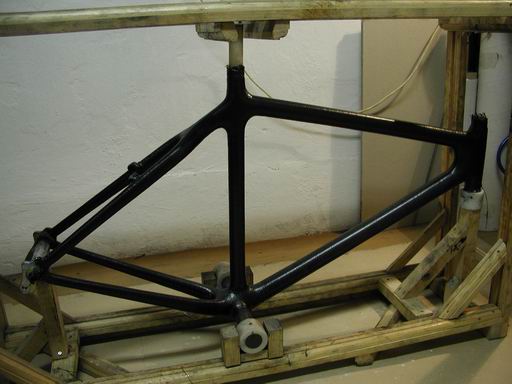
After adding all of the Styrofoam rods I sanded all of the added Styrofoam parts in the places of rods connection areas to achieve soft shapes. After that I wrapped these junctions with one light layer of fiberglass. After the curing of the epoxy resin, I softly sanded the whole surface.
Here is the finished frame core ready for carbon layups.
Materials for laminating - I chose a bi-directional woven carbon cloth (180 grams per square meter). I used MGS's L285 epoxy resin and 285 hardener for laminating.
Supplies - I used plastic foil from kitchen for covering the workbench during the wetting out the carbon, latex gloves, a small digital scale for weighing of the exact volume of resin and hardener, cups for mixing, paint brushes for wetting out, lots of electrical tape, sand paper and a respirator.
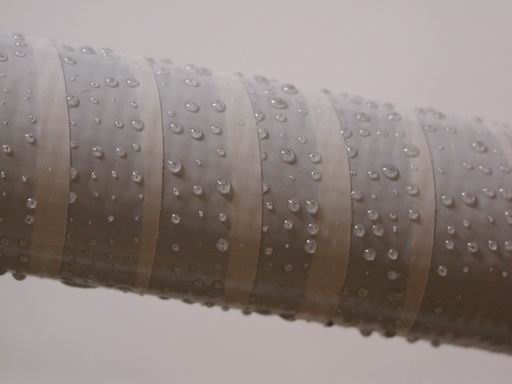
Layup - I was little bit afraid before I added the first layer because of my lack of experience. I only had theoretical knowledge of how to do it, but by following the instructions on how to mix the epoxy and how to wet out the carbon cloth it went okay. I wetted out the pieces of carbon and I added the first layer on the foam core. While it was still wet, I wrapped over the first layer of carbon tightly with electrical tape with sticky side up to provide compaction during curing. I could wrap tightly thanks to the aforementioned light layer of fiberglass, which increased the rigidity of the foam core significantly. Before wrapping, I perforated the tape with a pin over the whole surface. This squeezed out excess resin after wrapping.
This image shows the excess resin after wrapping.
In this picture, you can see the frame after the first layer was added and the electrical tape was removed. It began to look like a real bike frame. Approximately four hours after first layer had been done, I removed electrical tape lightly and I added another layer, and again, I wrapped over it with the tape. I tried to make as many layers during the day as possible, because after it fully cured overnight I had to softly sand the surface for the next layer. Before the last layer I bonded the rear brake bosses and reinforced them with few carbon layers.
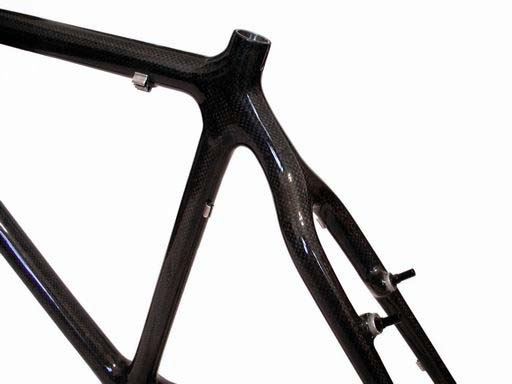
During construction, I combined the layers diagonally and cross-wise. On the top and down tubes and seat tube, there are 9 layers; on the chain stay and seat stay there are 11 layers. The high stress areas were covered with additional 6-8 layers.
This is the picture after the last layer of carbon. Finally I let the frame fully cure for a few days at about 50°C.
Finishing - after removal of the fully cured frame from the jig, I cut the excess carbon and I sanded the entire surface. Also I bonded the cable stops and then I sandblasted all the visible duralumin parts. I added a few layers of wet epoxy, with sanding between each layer. The whole surface was polishing for a better look. The last thing to be made was a thread on the bottom bracket shell.
Testing - I didn't do any proof testing as specified by ISO standards; I believe that the frame is rigid enough, and better than any other non carbon frame. I made this frame for my bike, so I will be guinea pig and perhaps I will stay alive after thorough road testing.
|